HomeDock OS 2.4: OnScreen Apps, Real Apps in Real Windows
HomeDock OS 2.4 introduces OnScreen Apps, real Docker applications running inside real windows, with automatic Let's Encrypt certificates, widgets and shortcuts
 Claudio González
Summarize with AI
Get the key points in your languageTen months ago we brought windows to self-hosting with Prism Windows Manager. It was a proper desktop: draggable icons, a taskbar, a start menu, and windows you could resize from all eight sides. But one thing was still missing, and everyone noticed it straight away. The second you opened one of your actual applications, you were gone. A new browser tab, a different address, and the desktop you had just been using was left behind.
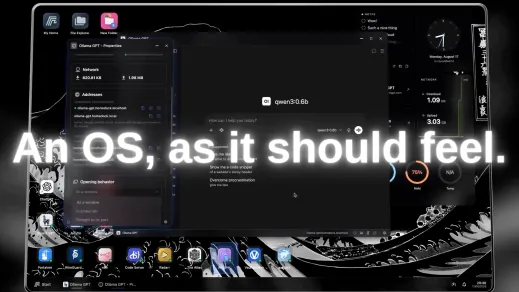
Today, that changes. HomeDock OS 2.4 is here, introducing OnScreen Apps: your Docker applications now open inside HomeDock OS, in their own window, with a title bar, alongside everything else you are using.
A Window Is Not a Picture of the App, It IS the App
This is worth making absolutely clear, because most people assume the opposite when they first see it: there is no capture, no re-rendering and no stream involved. What you see is the exact same page a browser tab would open, simply running with a window around it.
That difference stops sounding philosophical as soon as you use it. Audio keeps playing while you drag the window around the screen. A download started inside the app ends up exactly where you chose, in your normal downloads folder, through your own browser. A video stays at the same point while you move it, resize it or snap it into a corner. Nothing is being routed through a server and re-encoded before it reaches you.
Which means you can finally do the natural thing: place two applications next to each other and use both at the same time. Put Jellyfin beside Immich, beside a terminal. Resize them, overlap them, keep one in a corner while working in another. Window Snap has existed in HomeDock OS for some time, but until now there was nothing truly useful to snap. Now there is.
Try this with whatever you already have installed: ask your current dashboard to open two apps at the same time. Not two tabs. Two actual apps, on one screen, simultaneously, without losing either one.
Every App Gets Its Own Address
The technical explanation is simple: every application is served from its own address, generated from the container name. Install Jellyfin and it becomes available at jellyfin.yourdomain.com as soon as it starts. HomeDock OS routes requests using the Host header, rather than the path.
That design choice deserves a little explanation, because it is the foundation of the whole system.
The traditional approach is to place applications inside a folder under a shared address, something like /apps/jellyfin/. It may look cleaner, but it tends to break something eventually. The application does not know it has been relocated, so its HTML, CSS, JavaScript, redirects and cookie paths need to be rewritten while traffic passes through, and every one of those transformations is an assumption that can become wrong with the next application update.
Giving every application its own address means nothing needs to be rewritten. From the application’s perspective, it is running alone at the root of its own domain, exactly where it expects to be. Installing the application is the entire configuration: no proxy entry to create, no virtual host to configure, no container label to memorise. The address exists because the application has a name.
You can read the full breakdown in Every App Gets Its Own Address and OnScreen Apps in the documentation.
Certificates That Issue Themselves, and Renew Themselves
This one deserves its own section. HomeDock OS can now issue its own Let’s Encrypt certificates and renew them automatically.
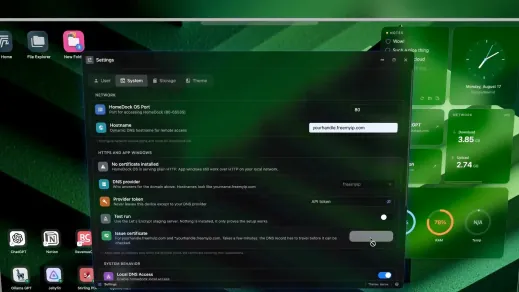
Not “follow this certbot tutorial”. Not a plugin, not a custom script, and not another container you need to install and maintain. Choose a DNS provider in Settings, enter a token, and HomeDock OS communicates with Let’s Encrypt to obtain a real, browser-trusted certificate for your domain and every application below it.
It uses the DNS-01 challenge, and that detail matters more than it may initially seem. Proving ownership of a domain often means allowing an external server to reach your machine, which is why so many guides begin by telling you to open a port. Here, ownership is verified through your DNS provider instead, meaning no incoming connection is made to your machine during the process, and no port has to be opened. Your router remains exactly as closed as it was before you began.
Three providers are currently supported: FreeMyIP, DuckDNS and Cloudflare. There is one difference worth knowing before choosing: FreeMyIP and DuckDNS automatically keep your IP address updated, so your domain continues working even when your ISP changes it overnight. Cloudflare does not, so you manage your own A record there.
Renewal checks happen every 12 hours and certificates are renewed when 30 days or less remain. You should not have to think about it again.
There is also an easy-to-miss benefit: most self-hosted containers were never designed to handle encryption, and many never will be. HomeDock OS terminates TLS in front of all of them, so every application gets the padlock, including that dashboard from 2019 that has no idea what a certificate is. Full details are available in Automatic Certificates.
Your Login, In Front of Everything
Applications without authentication of their own can now inherit yours. Every request to an application address is checked against your HomeDock OS session, and anything that arrives without one is rejected before it reaches the application. That admin panel which assumes nobody outside your home will ever discover it can now sit behind your login, wherever you access it from. See Apps Inherit Your HomeDock OS Session.
This creates a challenge for clients that cannot authenticate the way a browser does. The Jellyfin app on your TV, the Nextcloud client on your phone, or the Home Assistant companion app: none of them know how to sign in to HomeDock OS. They only know how to authenticate directly with the application.
Exposure is a per-application switch designed for those cases. It lives in Application Properties, defaults to gated, and changing it to direct allows that specific application to respond without a HomeDock OS session. Take the warning seriously: direct provides an address that bypasses your login, so it should only be used with applications that already have strong authentication of their own. App Exposure explains the details.
You Decide How Each App Opens
Windows are the default, not a requirement. Every application includes an Opening behavior preference inside Application Properties, with three choices:
-
As a window, the default, inside HomeDock OS.
-
In a new tab, the way it worked previously.
-
Straight to its port, connecting directly to the container and bypassing the proxy completely.
Configure it per application. If something genuinely needs the entire screen, it can have it.
Widgets, Where the Wallpaper Used to Be
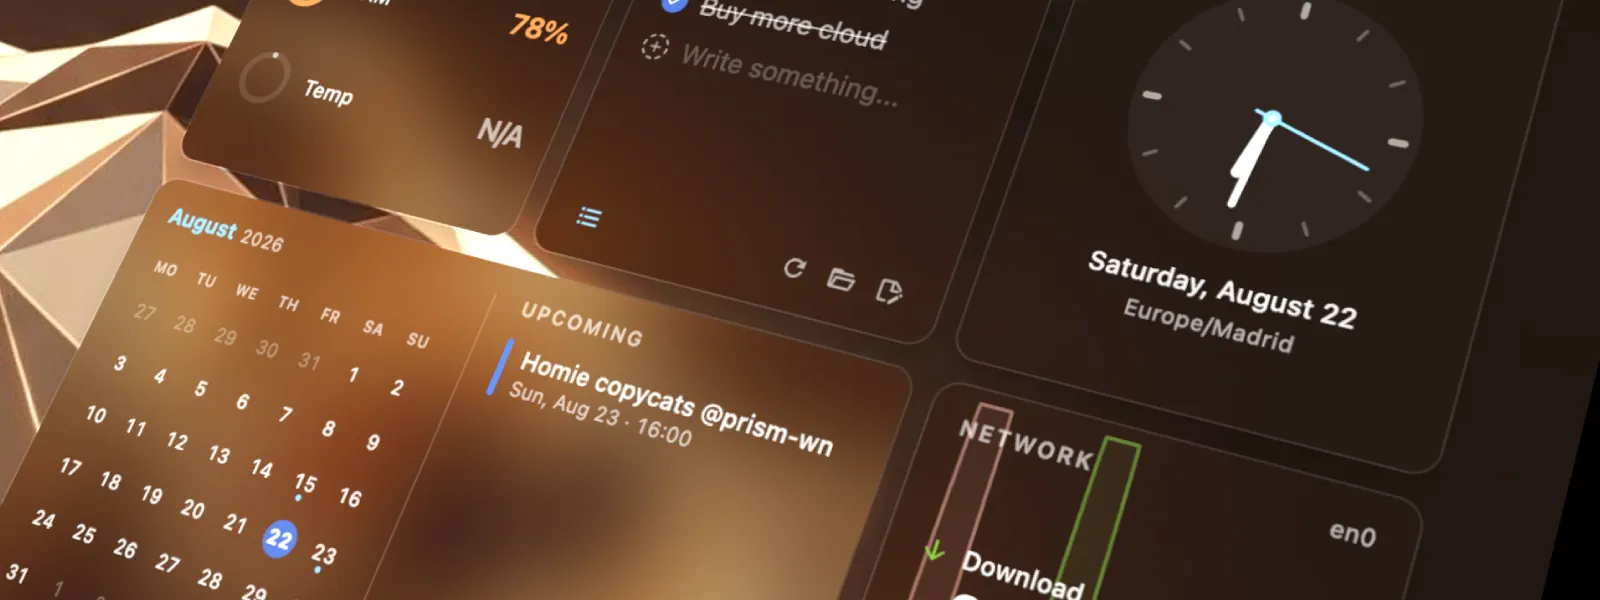
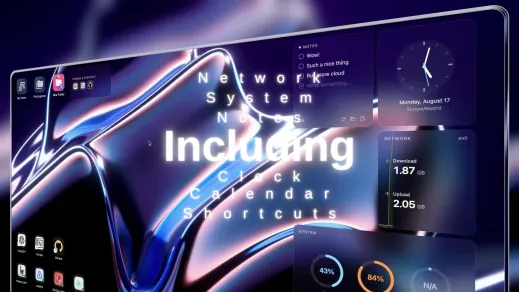
Right-click the desktop, choose Add Widget, and place one anywhere on the grid. There are eight available: Clock, System, Storage, Network, Calendar, Notes, Media and Shortcut.
Media displays whatever is currently playing, including cover art and play/pause controls. Shortcut connects to a URL shortcut you already have on the desktop and turns it into a one-click tile.
One clarification while we are here, because the names are similar enough to cause confusion: the System widget is not the system statistics panel in the taskbar. That one has existed since 2.0, is always available, and expands when you click it. This is a separate widget that you add from the gallery, place where you want, resize and remove.
And one honest detail you will notice the first time you experiment with them: not every widget supports all three sizes. Seven of the eight support a maximum of two, while Shortcut has only one. We’d rather provide the sizes that genuinely look good than fill the menu with unnecessary options. More information is available in Widgets.
Desktop Shortcuts, For URLs and For Files
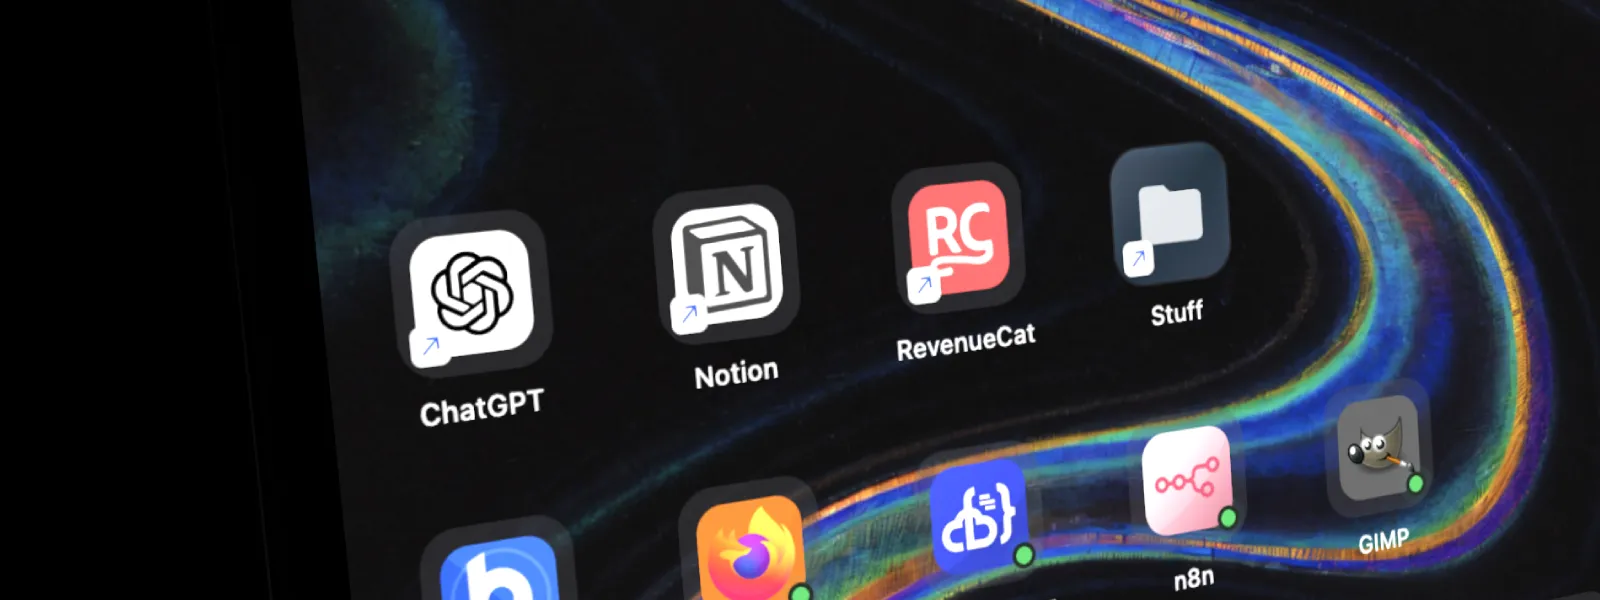
Two types are available, both appearing as proper desktop icons alongside your applications:
-
URL shortcuts: right-click the desktop, choose New Shortcut, and paste any address.
-
File and folder shortcuts: create them from File Explorer using Add to Desktop, across all four places where your files can live: Storage, Drop Zone, App Drive and Disks+.
The icon is configured separately: choose one from the catalogue, upload your own, or let it inherit the icon associated with the file type. And nothing gets copied, because a shortcut is simply a pointer and takes virtually no space. See Desktop Shortcuts.
Quick View
Once your applications become real windows, you can quickly end up with quite a few of them. Quick View displays every open window in a grid, including its name and icon. Press F3 or Ctrl/Cmd + ↑, or choose it from the desktop right-click menu. Select one and the rest return to their normal position.
It is a desktop-only feature, so Quick View is not available on mobile. Read more about Quick View in the documentation.
Screenshots, From the Desktop Itself
Right-click the small vertical line at the edge of the screen and select Screenshot. HomeDock OS uses your browser’s own picker, captures exactly what you are seeing, including open applications, and saves the file directly into Storage → Photos. No folder selection and no filename to enter.
Available Now
HomeDock OS 2.4.2.120 is available today for everyone. If you are already running HomeDock OS, you will receive the update notification, and the first time you sign in afterwards the release notes will open automatically, so you do not need to search for what changed.
We spent 2.0 building a desktop, then watched people leave it every time they opened an application. 2.4 is the release where you no longer have to. Your applications, running in windows, next to one another, on a real domain, behind a real certificate you never had to worry about, protected by your own login.
A VPS, a Raspberry Pi beneath the TV, or HomeDock OS Desktop on your Windows or macOS machine: the desktop was already the same across all of them. What changed is what now lives inside it.
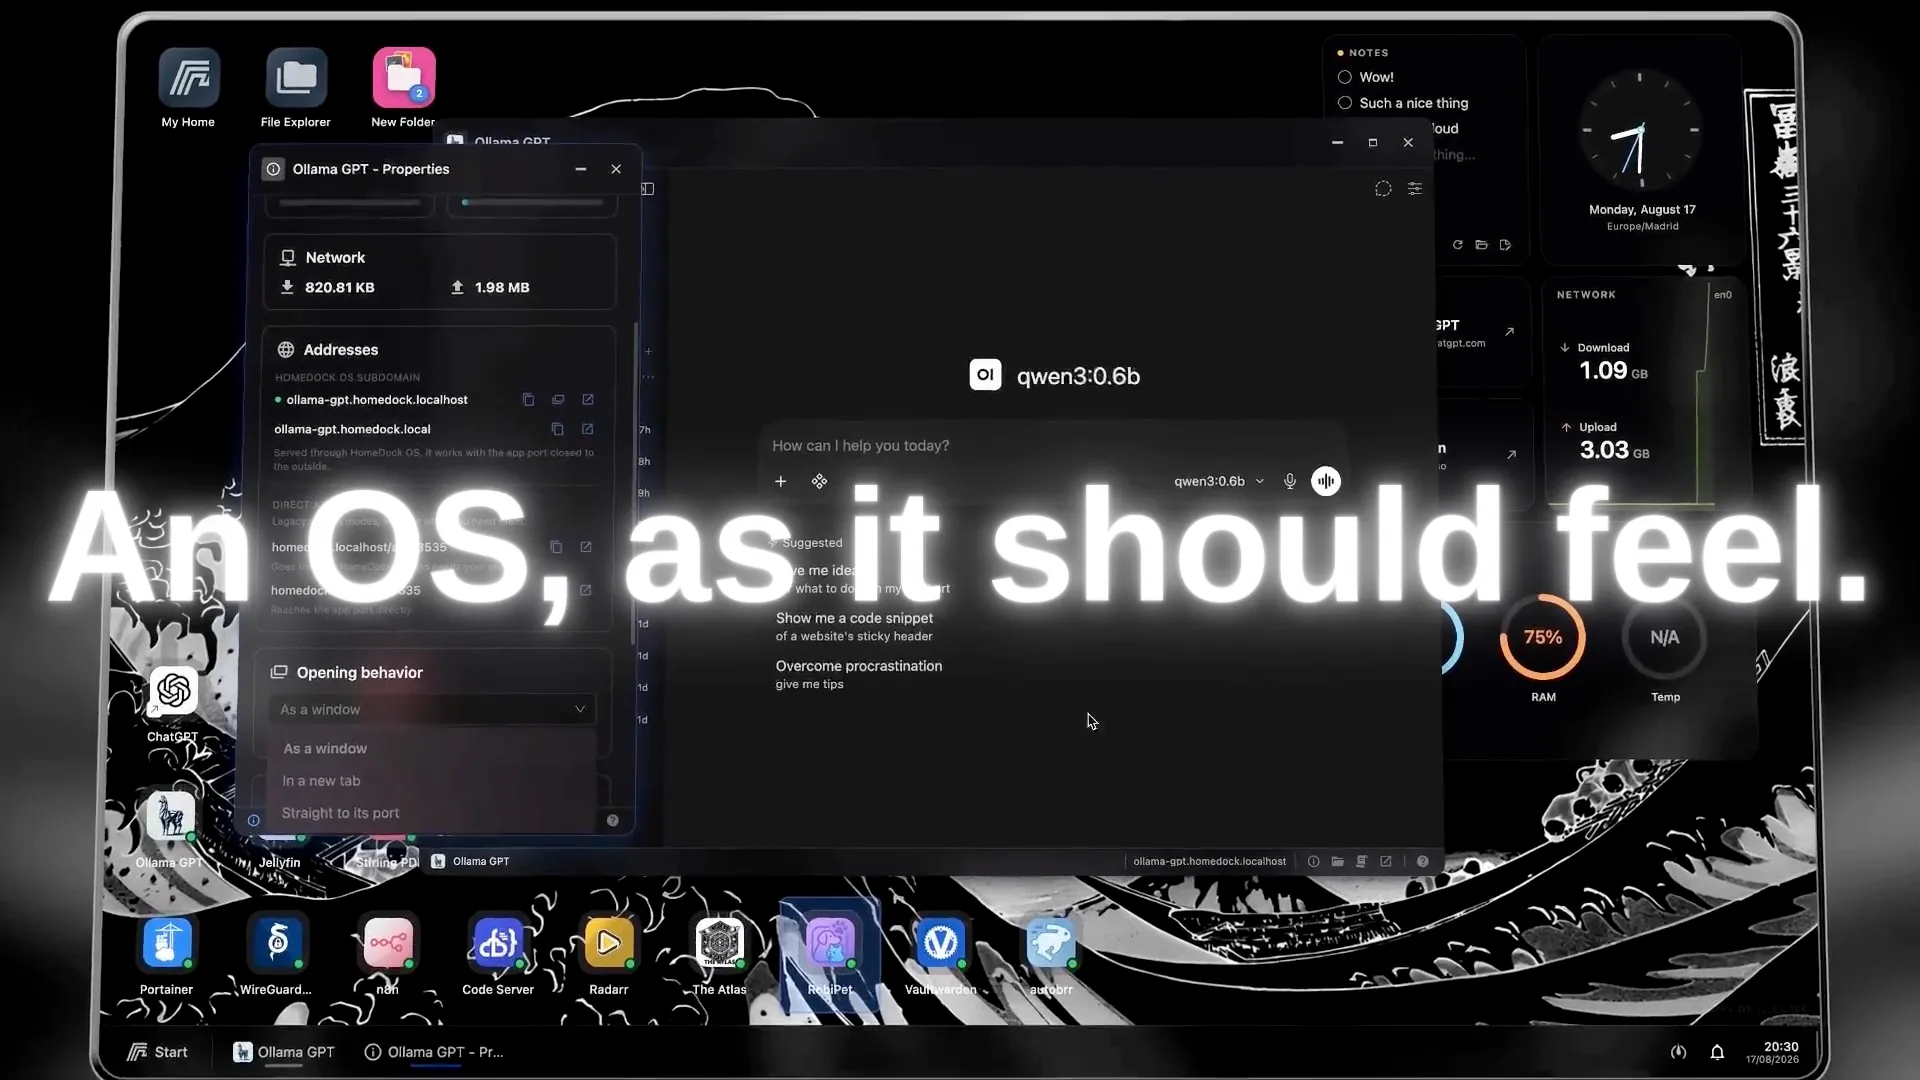 ☁ HomeDock OS: The Desktop beyond TabsWatch on YouTube · Opens in a new tab
Thanks for being part of this journey ❤️
Image Gallery