Build Your Private Cloud with Raspberry Pi for Under $100
Turn a Raspberry Pi into a powerful private cloud with HomeDock OS. Complete setup guide and hardware recommendations to get your own home server on a budget
What if you could test-drive your own private cloud for under $100, risk-free?
We get it. Committing to a new cloud platform is a big decision. That’s why we’re showing you how to try HomeDock OS on a Raspberry Pi before investing in our managed cloud infrastructure.
Think of it as a sandbox. A place to explore every feature, install apps, test your workflows, and see if HomeDock OS fits your needs. All without monthly commitments, credit cards or Plus+ paywalls.
Why Raspberry Pi + HomeDock OS?
The Raspberry Pi has been around for years, but most people still associate it with hobby projects and educational experiments. We see something completely different, the perfect hardware for true digital sovereignty.
When you combine a Raspberry Pi with HomeDock OS, you get:
- • Try before you buy with the exact same platform and experience as our managed cloud
- • Military-grade encryption for your cloud storage built-in
- • Full App Store access with hundreds of self-hosted applications
- • Remote access from anywhere with built-in HTTPS with support for self-signed certificates
- • Energy efficient operation that costs pennies per month in electricity
- • Add your own apps privately to the App Store of your HomeDock OS Instance
- • Learn at your own pace without pressure or commitments
And the best part? You don’t need to be a Linux expert, know Docker commands, or understand networking. HomeDock OS handles all of that for you. When your Raspberry Pi can’t keep up with your growing needs, or you want the reliability of enterprise infrastructure? Migrate to HomeDock OS Cloud within minutes and enjoy backups and restore points, 99.9% uptime, and automatically updated Let’s Encrypt CA-Signed HTTPS certificates, all while keeping the same familiar interface and apps you’ve already set up.
The Complete Hardware Shopping List
Building your Raspberry Pi private cloud is straightforward. Here’s exactly what you need:
Essential Components ($80-100)
Raspberry Pi Board ($60-80) We recommend the Raspberry Pi 5 with 8GB RAM for optimal performance. The 4GB model works fine for lighter workloads, but the 8GB version ensures smooth multitasking when running multiple applications simultaneously. If you’re on a tighter budget, a Raspberry Pi 4 Model B (8GB) still delivers excellent performance, and HomeDock OS while idle almost doesn’t consume any resources compared with other alternatives.
MicroSD Card ($10-15) Get a 64GB or 128GB Class 10 (U3/V30) card from a reputable brand like SanDisk or Samsung. Storage speed matters for system responsiveness, avoid cheap no-name cards that will bottleneck your entire setup later, the fastest the better.
Power Supply ($8-15) Use the official Raspberry Pi USB-C power adapter (5V/3A for Pi 4, 5V/5A for Pi 5). Cheap power supplies cause instability, random crashes, and data corruption. Don’t cut corners here.
Recommended Additions ($22-32)
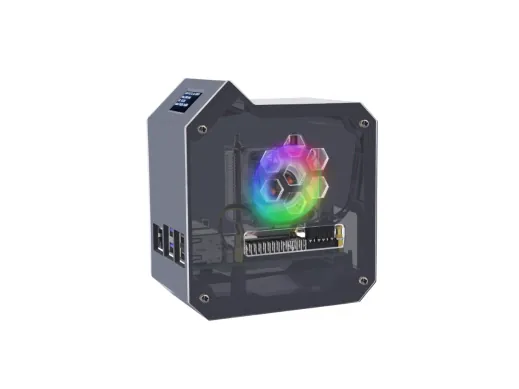
Case with Active Cooling ($9-16) A case with a fan and / or heatsink keeps your Pi running cool under load. The Argon ONE M.2 case is particularly elegant if you want to add NVMe storage later, but we’ve seen huge improvements by using the Ice Tower cooler fan too, it’s amazing.
USB External Drive (Optional) ($40-65) If 128GB isn’t enough, add a USB 3.0 external SSD for expanded storage. HomeDock OS makes it trivial to mount and integrate additional drives straight from the Settings app.
Total Investment: $80-160
Basic setup: $80-100 Professional setup with extras: $130-160
This one-time investment lets you test HomeDock OS risk-free. Try every feature, install apps, and see if it fits your workflow. If you love it and need more power or reliability, our managed HomeDock OS Cloud Instances starts at just 9.95€/mo, giving you enterprise-grade infrastructure without the hardware maintenance.
Setting Up HomeDock OS on Raspberry Pi
Once you have your hardware, getting HomeDock OS running takes about 10 minutes. Here’s the streamlined process:
Step 1: Flash Raspberry Pi OS
Download Raspberry Pi Imager from the official Raspberry Pi website. Insert your microSD card, select Raspberry Pi OS (64-bit) as your operating system, and flash it to the card. Before writing, click the gear icon to configure:
- • Hostname (e.g.,
homedock-cloud) - • Enable SSH with password authentication
- • Set your username and password
- • Configure Wi-Fi if not using Ethernet
- • Flash the card and insert it into your Raspberry Pi.
Step 2: Boot and Connect
Power up your Raspberry Pi and wait about 60 seconds for the first boot. Find your Pi’s IP address from your router’s admin panel or use a network scanner. SSH into your Pi from your computer:
ssh username@raspberry-pi-ip-addressStep 3: Install HomeDock OS
This is the magic moment. Run the HomeDock OS installation command:
curl -fsSL https://get.homedock.cloud | sudo bashThe installer will:
- • Detect your Raspberry Pi hardware and underlying OS
- • Install all required dependencies using apt and pip
- • Set up Docker and container orchestration
Grab a coffee. The installation takes about 5-10 minutes depending on your internet connection.
Step 4: Access Your Cloud
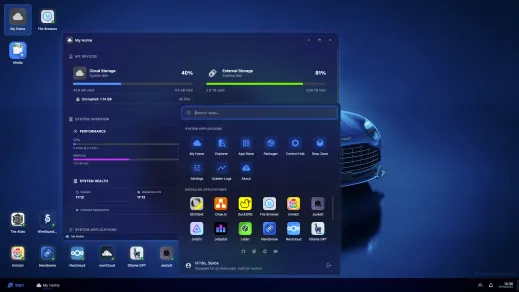
Once installation completes, the installer displays your HomeDock OS access URL. Open it in any browser on your network, and you’ll see the HomeDock OS Prism Window Manager ready to go.
Complete the initial setup wizard, which walks you through:
- • Login with the default user and password (change it later)
- • Configuring storage encryption on Drop Zone
- • Choosing your first applications
That’s it. Your private cloud is live.
What Can You Actually Run?
The Raspberry Pi might be small, but with HomeDock OS, it’s surprisingly capable. Here are real-world applications that run smoothly:

Additional Applications That Work Great
- • Uptime Kuma: Monitor all your online services and get instant notifications
- • Pi-hole: Network-wide ad blocking that protects every device on your network
- • Minecraft Server: Host your own dedicated Minecraft world for friends and family
- • WPS Office: Your own office suite but… On the cluod, works like magic
- • Syncthing: Continuous file synchronization between devices without intermediaries
All installable with one click from the HomeDock OS App Store. No configuration files, no terminal commands, no headaches.
Real-World Performance
Let’s talk about what the Raspberry Pi can actually handle running HomeDock OS:
Raspberry Pi 5 (8GB) Performance
- Idle resource usage: 2-4% CPU, 0.3GB RAM
- With 5 apps running: 25-35% CPU, 3-4GB RAM
- File upload speeds: 30-80 MB/s (depending on network)
- Media streaming: Handles 2-3 simultaneous 1080p streams
- Power consumption: 5-8W under load ($1-2/month electricity)
What About Limitations?
Be realistic about expectations. The Raspberry Pi excels at personal and family workloads like file storage and syncing, password management, photo backup and organization, smart home automation, development and Git hosting, light media streaming, and network services like Pi-hole. It’s the perfect home server for everyday tasks that don’t require heavy computational power.
However, the Pi will struggle with resource-intensive operations like transcoding 4K video in real-time (though 1080p works fine), hosting high-traffic public websites (personal use is perfectly smooth), running 15+ demanding apps simultaneously, machine learning and AI workloads, or large-scale database operations. These limitations aren’t dealbreakers for most users, they’re just physics and hardware constraints.
For personal and family use, the Raspberry Pi is exceptional. But when you outgrow it or want bulletproof reliability? That’s where HomeDock OS Cloud shines.
Start Small, Scale When Ready
Your Raspberry Pi is perfect for testing and personal use with seamless remote access from anywhere. But if you don’t want hardware running at home 24/7? HomeDock OS Cloud Instances gives you the same platform on professional infrastructure.
No SD card failures, no power outages, no port forwarding. Just automatic snapshots, restore points, and CA-signed Let’s Encrypt SSL certificates that renew automatically.
Want to keep your Pi forever? That’s fine too. HomeDock OS is open source and free to self-host. The choice is yours.
Get Started Today
Building your Raspberry Pi private cloud is surprisingly easy. Here’s your path forward. Perfect for production workloads, remote teams, high availability, and zero-maintenance setups.
HomeDock OS
Questions? Want setup guidance? Ready to migrate from your Pi to the cloud or vice-versa? Join our Discord community where our team, hundreds of users, and our own codebase-based AI help each other daily. From hardware troubleshooting to cloud migrations, we’re here to support your journey.
Image Gallery
Related Links